
⚠️ ADMIN ACCESS REQUIRED⚠️
If you do not have Admin access, please reach out to client services via the chat icon or at clientservices@gapmaps.com for assistance.
Adding or Viewing Metadata Fields
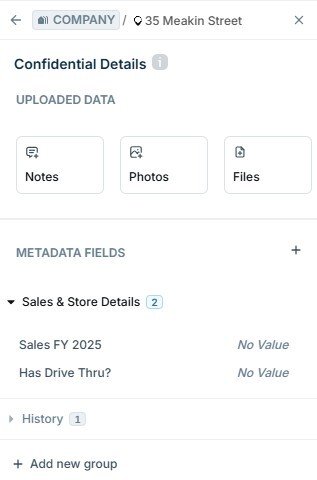
Metadata fields can be used to capture information about each of your individual sites on GapMaps. They appear in the 'Attached Details' section on the pin panel of pins in your company locations.
Accessing the Metadata Field Editor
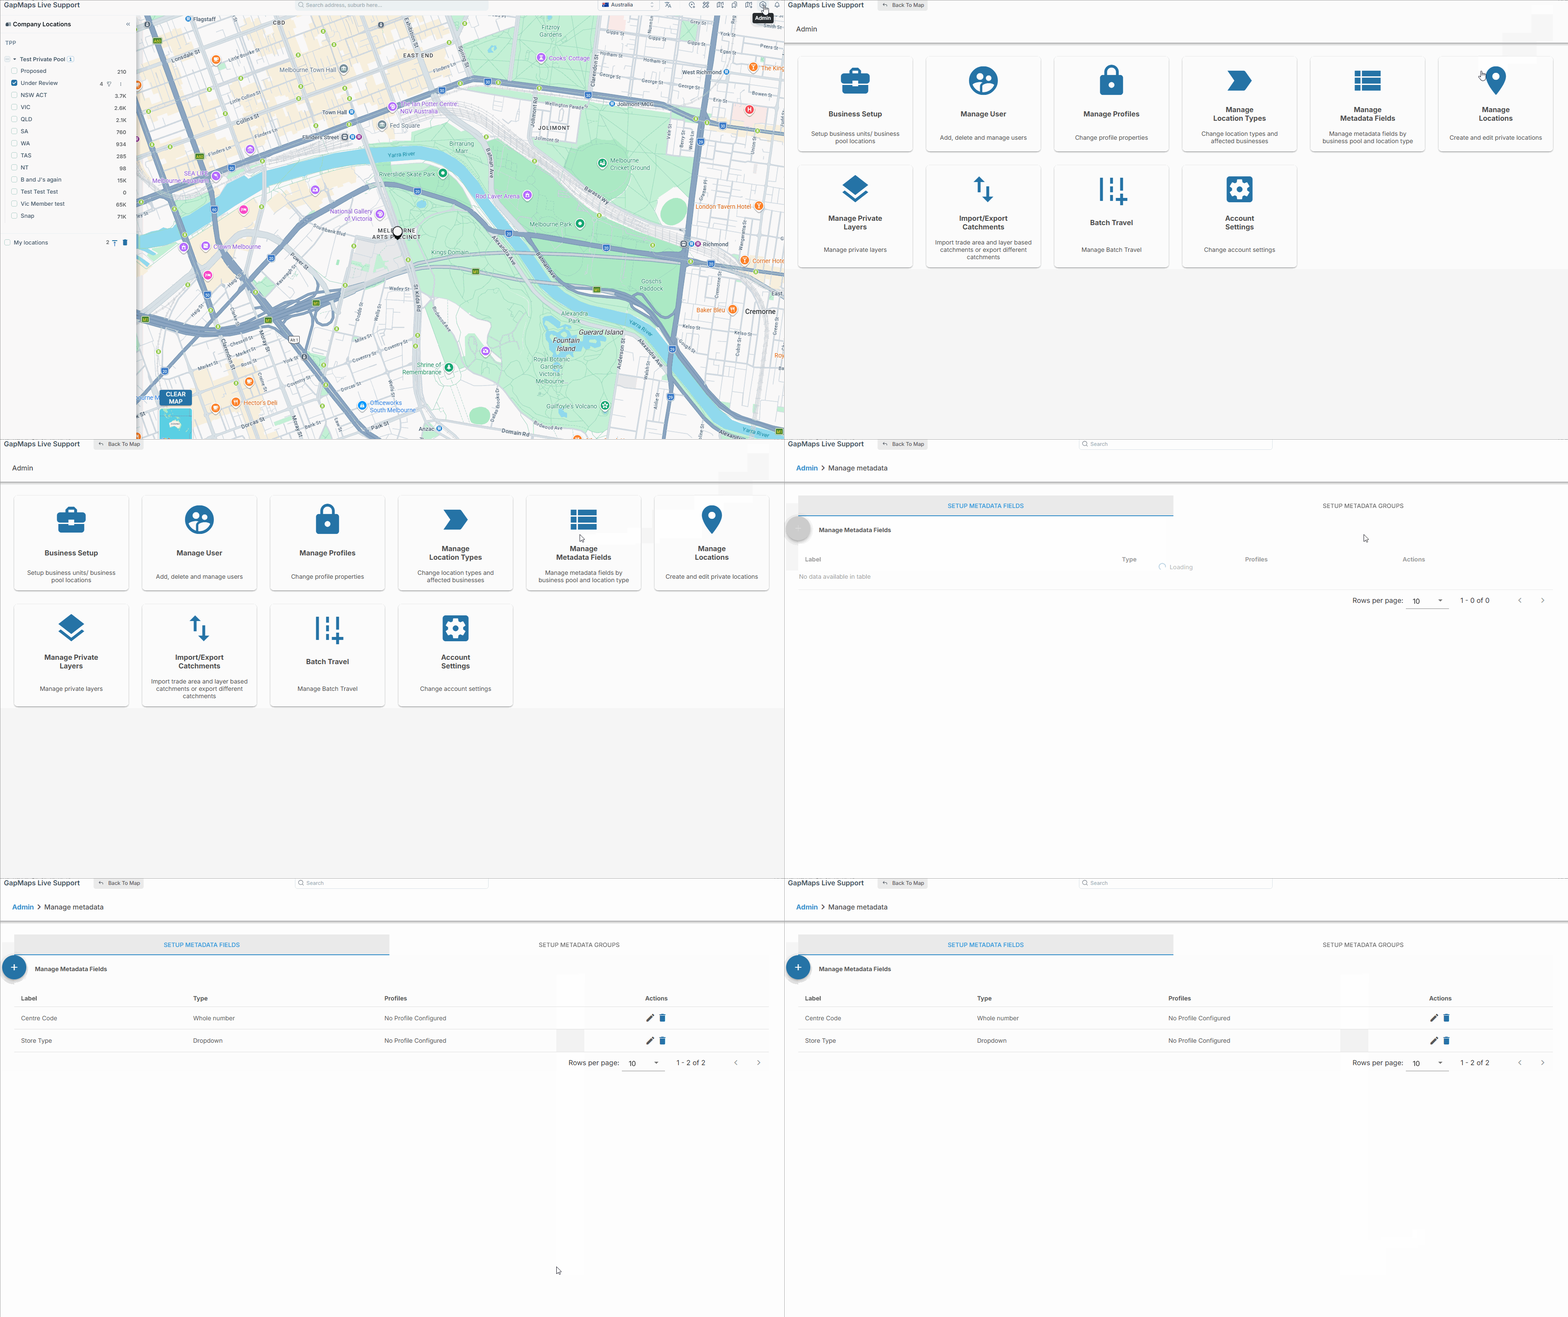
- Click on Admin
- Click on 'Manage Metadata Fields
Adding Metadata Fields

- Click the '+'
- In 'Label' enter the name of the metadata field you wish to add
- In 'Label Type' select your preferred metadata field type
- Assign the location types that you are wanting the new metadata field attached to.
- Select which User Profiles you wish to be able to view or edit the metadata field
- Click 'Save Field'
Once saved, the metadata fields will appear in the 'confidential details' section of the pin panel on pins saved to your company locations.
Metadata Field Types
|
Numeric |
The only answers able to be entered will be numbers without decimals |
|
Text* |
The only answers able to be entered will be text
Note: Answers provided in this field have a character limit of 250 |
|
Yes/No |
The only answers able to be selected is yes or no |
|
Dropdown |
The only answers able to be selected are those from a drop down. See below on how to select the drop down answers. |
|
Double* |
The only answers able to be entered is numbers or numbers with decimals |
*Field is not able to be filtered
How to add Dropdown Fields
Once the field type 'dropdown' has been selected, a section will open. In 'option' enter the name of the dropdown label.
- To add more labels select the '+'
- Entered fields will appear in blue underneath 'option'